
Homemade Oreo Cookies - The Halloween Edit
Over the years, I have collected more cookbooks than my bookshelves can possibly hold. I absolutely love my books, and although I have yet to try all the recipes, they are an endless source of inspiration. Give me a new cookbook or a great novel on a lazy afternoon, and the cookbook wins every time!
There are many chefs whose work I admire, and Thomas Keller is right at the top of my list. The genius behind The French Laundry, Bouchon and Per Se, Keller is a major force in the culinary world. With several of his books scattered across my shelves, he’s someone I turn to whenever I need a fresh perspective.
An old friend had no idea how much I admired Keller’s work when she gave me his Bouchon Bakery book one Christmas. Every page was filled with mouthwatering decadence, and every recipe spoke to the dessert lover in me. But it was his modern take on the Oreo that really piqued my curiosity. Could a sugary, pre-packaged snack be made with natural ingredients? Could it taste better than the original and become something sophisticated and delicious? You’d better believe it!
In true Keller fashion, the TKO (the Thomas Keller Oreo) is nothing short of brilliant: slightly salted dark chocolate shortbread sandwiched around a creamy white chocolate filling. For my version, I’ve paired his shortbread with a whipped white chocolate ganache infused with real vanilla. It’s light, silky and the perfect contrast to the deep, dark cookie.
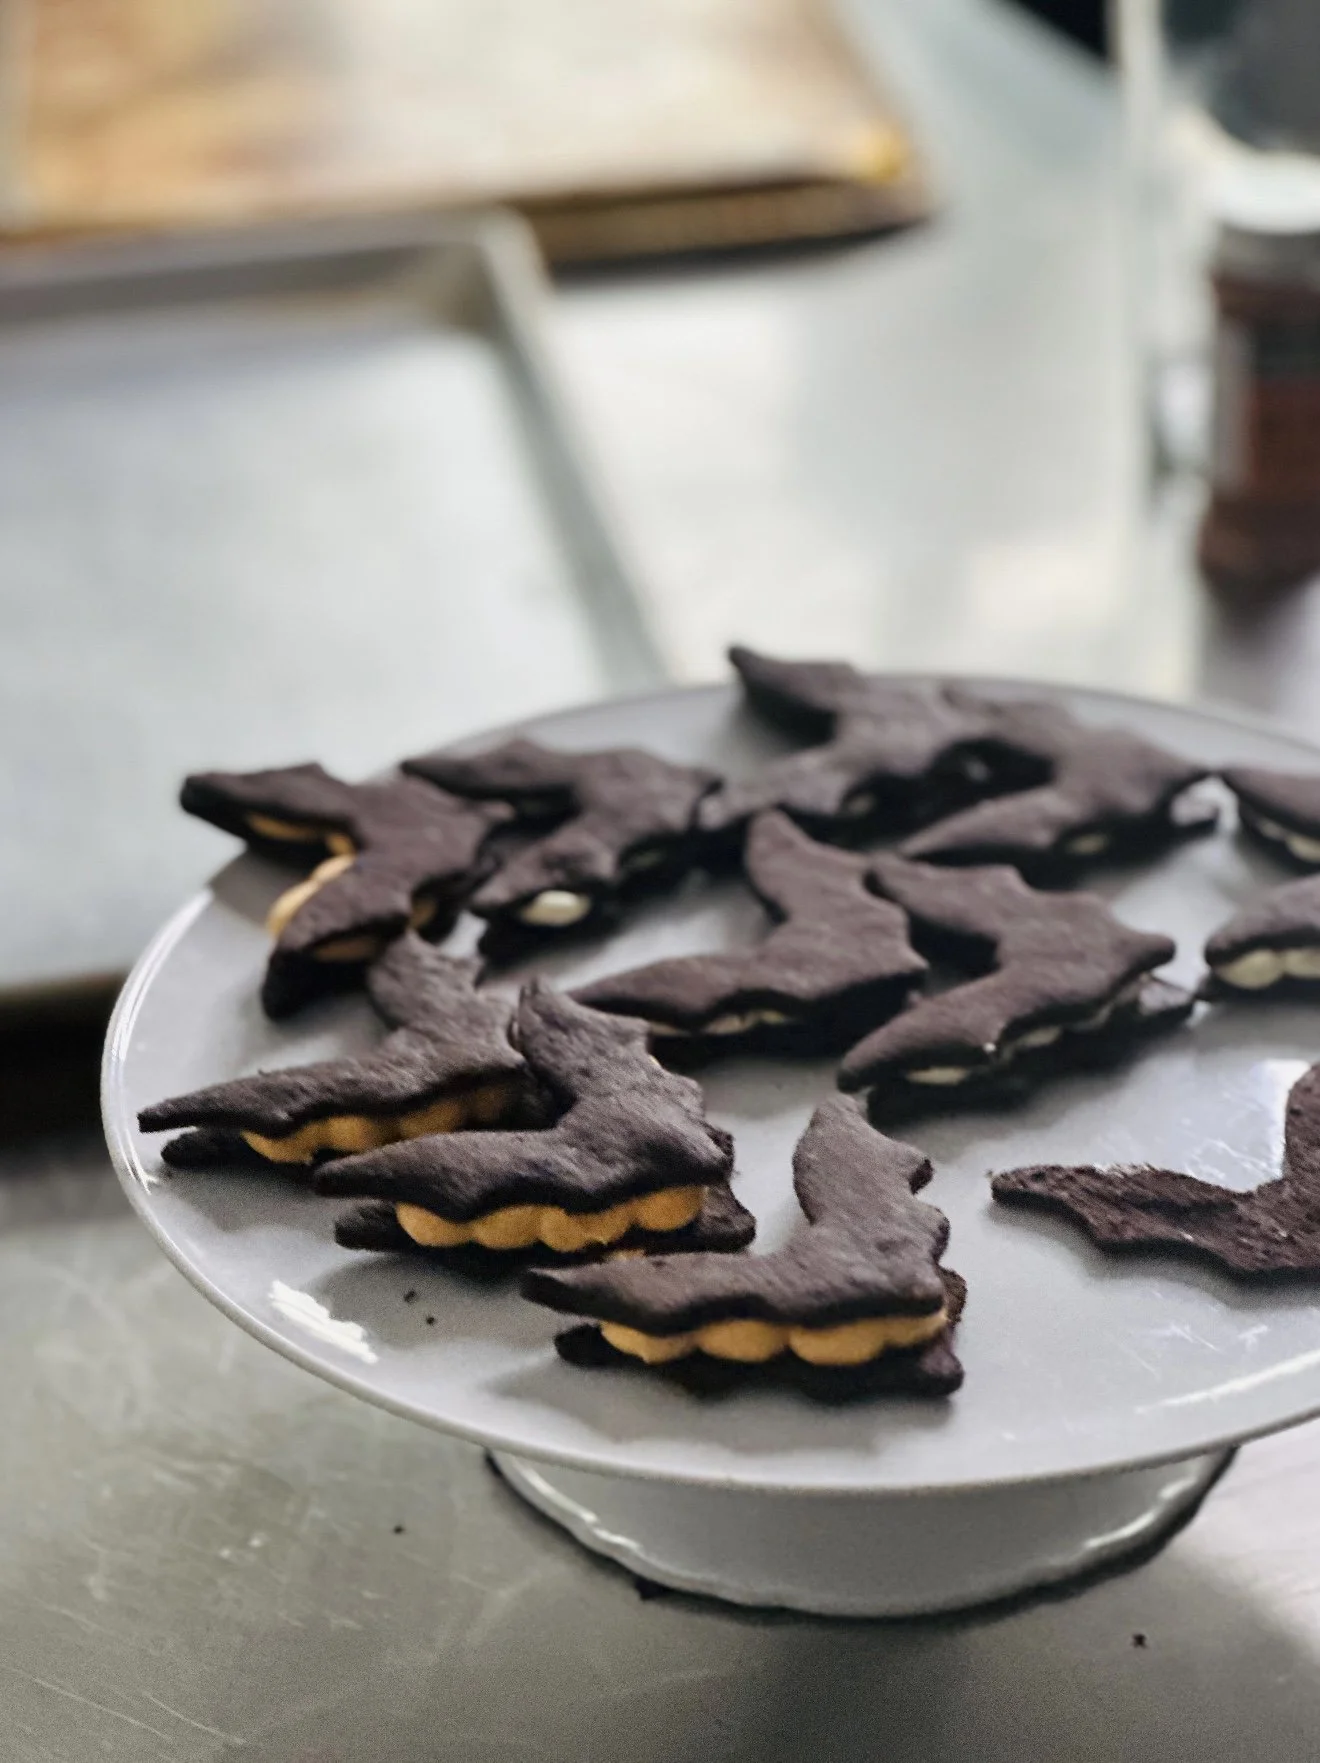
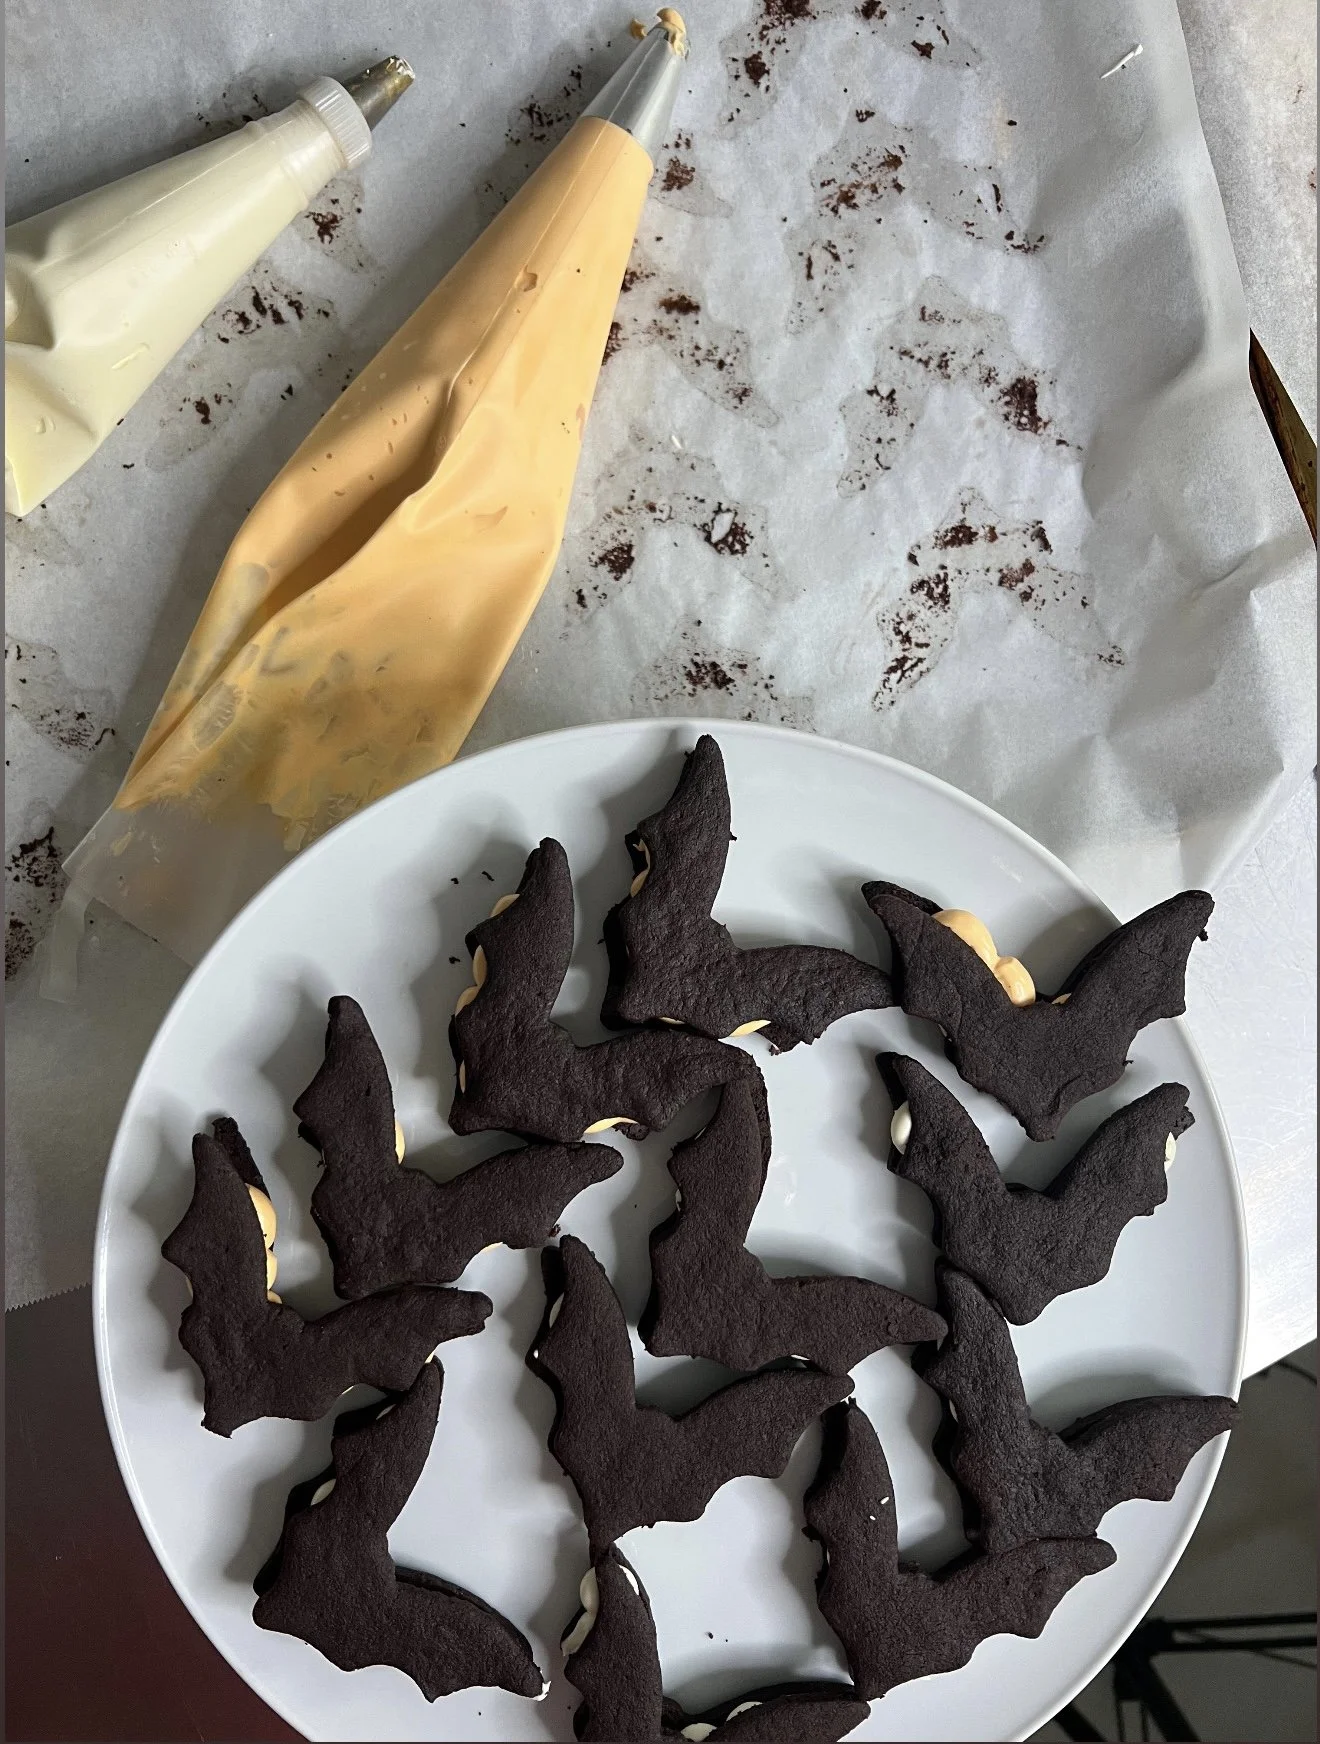
And because it’s October, my oreos have gone a bit spooky. Instead of the classic fluted rounds, I cut the dough into little bats, so the dark chocolate shortbread becomes the wings and the white ganache peeks out from between them. I also added a touch of orange gel food coloring for a spooky vibe. They’re just as delicious, and far more fun on a Halloween platter.
These really are the grown-up version of the Oreo. Tested on my kids and their friends, they’ve been a hit with everyone who’s tried them. Even my Oreo-loathing husband approves.
Here’s my simplified adaptation of Keller’s TKO recipe, Halloween style.
Makes about 16 sandwich cookies, depending on the size of your cutter.
Note: I used a bat-shaped cookie cutter, but feel free to use any shape you like. Hearts for Valentine’s Day, ovals for Easter, or a 3-inch fluted round for the classic look.
Homemade Oreo Cookies
Makes 12 to 14 cookies
Make the ganache first, ideally the day before, because it needs at least 3 hours to chill before it can be whipped.
White Chocolate Ganache
Ingredients
- Whipped White Chocolate Ganache
- 200 g (7 oz) white chocolate
- 100 ml (just under ½ cup) whipping cream, to be heated
- 190 ml (¾ cup) cold whipping cream
- 1 tablespoon vanilla bean paste, 1 tablespoon of good vanilla extract or 1 vanilla pod
- a few drops of orange food coloring, optional
Add the vanilla bean paste and vanilla extract to the 100 ml of whipping cream and bring it to a boil. If you’re using a vanilla pod, split it in half, scrape out the seeds and add both the pod and the seeds to the cream. As soon as it starts to boil, take it off the heat and let it infuse for 30 minutes to an hour.
While the cream infuses, melt the white chocolate in a bain-marie, or in the microwave on low, and set it aside. A bain-marie gives you the most control. Just keep the water at a gentle simmer, not a rolling boil.
Reheat the infused cream until it’s just starting to simmer. Pour a third of the hot cream over the melted chocolate and stir with a spatula until it comes together, then repeat with the remaining two thirds. Use a spatula rather than a whisk here so you don’t beat air bubbles into the ganache. Once the hot cream is fully mixed in, add the 190 ml of cold cream and stir until smooth. An immersion blender works well at this point if you have one. Add the orange food coloring if using.
Cover the ganache with plastic wrap and refrigerate for at least 3 hours, or preferably overnight. It needs to be very cold to whip properly.
Chocolate Shortbread
Ingredients
- 1 ¾ cups plus 1 ½ tablespoons (220 grams) all-purpose flour
- 1 cup plus 1 ½ tablespoons (93 grams) unsweetened cocoa powder
- ⅜ teaspoon baking soda (yes, it really is 3/8ths!)
- 8 ounces unsalted butter (227 grams), at room temperature
- 2 teaspoons salt
- ¾ cup plus 1 tablespoon (165 grams) granulated sugar
Place the flour, cocoa powder and baking soda in a bowl. Whisk and set aside.
Put the butter in a large bowl. With a stand or hand-held electric mixer, mix the butter on low speed until smooth. Add the sugar and salt and mix for about two minutes until fluffy. Scrape down the sides and bottom of the bowl so everything is incorporated.
Add half the cocoa and flour mixture to the butter and mix on low speed for about thirty seconds. Repeat with the rest of the mixture until the dough just comes together. Don’t overmix.
Turn the dough out onto your work surface, bring it together and form a block. Wrap it in plastic wrap and refrigerate until firm, about an hour. You can keep the dough in the fridge for up to two days or freeze it for a month.
Preheat the oven to 350°F (175°C), or 325°F (160°C) for a fan oven. Roll the dough between two sheets of parchment paper to about ⅛ inch (3 mm) thick and cut out your cookies with whatever shape you are using. Place them on a lined baking sheet and chill for 10 to 15 minutes before baking.
Bake for 15 to 18 minutes, until the cookies are set and slightly cracked on the surface. You won’t be able to ignore the sweet, chocolatey smell. It’s amazing! Let the cookies cool completely before filling them.
Any leftover dough can be gathered up and rolled again. You can also bake the scraps and crumble them over ice cream, use them as a cheesecake base, or just snack on them.
Assembling the Cookies
Before whipping, put your mixer bowl and whisk attachment in the freezer for 5 minutes. Cold tools make the ganache whip much more easily.
Take the ganache out of the fridge and whip it with an electric or stand mixer, starting on low to medium speed and gradually increasing. Keep going until it has doubled or even tripled in volume and holds firm peaks that stay put on the whisk.
Using a piping bag, pipe enough ganache to cover each bat, leaving a little space around the edge. You can also mound the ganache onto the cookie with a spoon and spread it into an even layer. Top with a second bat, smooth side up, and press gently until they come together.
I guarantee you’ll never eat another packaged Oreo again!